
User Tools
Sidebar
remote_upgrade_poc
Table of Contents
Remotely Upgrade FreshTomato
This Wiki article originates from a thread on the Tomato Forums titled: Remotely upgrade FreshTomato initiated on Dec 28, 2022 by user: xixix@linksysinfo
It describes requirements, use cases, preconditions, approach, facilitators, deal-breakers, and proof of concept.
Requirements
The original requirements were to:
- Remotely upgrade a Freshtomato router's firmware
- Perform the upgrade in an isolated location
- Perform the upgrade when physical access is not easily available
Use Cases
- Computer-challenged friends/relatives
- Remote monitoring sites, such as:
- Cottages in the wilderness (with a set of local IOT-enabled devices)
- Observation decks, stations, facilities
- Weather stations
- Pollution monitoring sites
- Remote properties or estates
- Airbnb vacation homes or condos
Preconditions for Proof Of Concept
- A Netgear Rx000-series router preinstalled with FreshTomato 202[12].x AIO
- The router is connected to the Internet via WAN0:
- Connection Type is set to: PPPoE.
- Wireless Client Mode is set to: Disabled.
- Username is saved in FreshTomato.
- Password is saved in FreshTomato.
- The router's LAN subnet is configured to “192.168.1.0”.
- A VPN server is configured, enabled and working.
- Dropbear/SSH access is possible.
- The internal network has an Ethernet LAN client that accessible via Teamviewer,
once Internet connectivity is available after minimal upgrade & reconfiguration.
This will be used to complete other major reconfiguration.
Tentative Approach
- Script the download of the new FreshTomato firmware version (using curl and wget).
- Manually flash from the command shell of the new firmware (How? Should we use mtd write? dd?)
- Reset/erase all data in NVRAM from within the shell (How? Using nvram erase?)
- Set minimal NVRAM parameters for Internet connectivity:
- Connection Type is set to: PPPoE (wan_proto)
- Username (wan_ppp_username)
- Password (wan_ppp_passwd)
- Reboot.
The script_init or script_wan NVRAM parameters could also be used for post-reboot initialization/reconfiguration activities.
Some fail-safe logic and logging might be included and scripted, for the critical “blind reboot” phases. This would be done in such a way that if the upgrade failed, the router could be reverted to a working firmware version/configuration and rebooted.
Concerns, Issues, and Known Challenges
Summary: Don't perform remote upgrades unless you have a tested recovery strategy (such as a backup router, emergency on-site presence, fallback options).
If you do, you should have answers to the following questions:
- How critical is Internet access at the remote location?
- How quickly can you reach the remote location to fix possible problems?
- Best practices include firmware upgrades when available. However, in remote configuration scenarios,
only high impact CVEs should be considered. Does this rule apply in your scenario?
- Make a backup plan in case the upgrade fails:
- Keep a spare device on site, fully configured and ready, or;
- Reach the remote location in x hours/days or;
- Have someone on site who can recover from a failure.
- (Such as using the Reset button to restore the backup configuration/switch to PC internet only)
- A problem with these routers is the newer firmware is written on top of the running firmware.
This involves some risk that the (now invalid) filesystem could cause issues/ crash during reboot.
This would cause a manual power cycle
to be needed.- This could be easily resolved if someone on site could perform the power cycle.
- Asus tries to avoid this by creating a temporary rootfs where the critical bits are copied during reboot.
It's unknown if FreshTomato does. Even if it did, it wouldn't be fully reliable if a component were missing.- Newer Broadcom routers solve this using two firmware partitions. The new firmware is written to
the other partition, so the running filesystem remains intact. - If you need something that is remotely managed, you need a router designed for that.
- Trying to script fail-safe procedures for all possible scenarios will require a lot of work.
- Other, potentially unrecoverable issues remain when physical access isn't available.
Even in non-critical use cases,
it's annoying to perform that kind of recovery.
- You are strongly advised to perform an NVRAM full erase/reset after a FreshTomato upgrade.
- On its first run, FreshTomato will recreate and initialize required default parameters.
- A “dirty” upgrade (without NVRAM full erase/reset) might work. However, it is strongly discouraged,
since conflicts of current parameters/functions with the old ones can cause issues.
- A form of permanent storage is needed. A full erase/reset of NVRAM-stored parameters via mtd-erase
is not committed until the next reboot/power cycle.- What is the difference betweeen the mtd-erase and nvram erase commands?
- Issuing the nvram erase command still erases the nvram mtd. However, on actions like a reboot,
NVRAM is saved to mtd from RAM. Thus, it will not wipe everything unless power is removed
right after the command completes. However, nvram erase clears the NVRAM in RAM then writes to flash,
but doesn't zero out all the flash. See also: Hard reset or 30/30/30 - DD-WRT Wiki - The nvram erase command maintains the NVRAM header/checksum/length structure but erases variables.
The mtd command erases a flash partition's sectors, leaving its data values set to “FF” (flash erase state).
- Thus, options for storage persistence would seem to be:
- JFFS. However, by default, if NVRAM is cleared, JFFS is unmounted. Also, JFFS needs to be unmounted
before an upgrade, since occasionally it gets repartitioned/reformatted to a different size if the image grows.
(See www.linksysinfo.org forum for more details) - USB storage
- All forks of Tomato trigger execution of certain shell scripts with the <filename>.autorun extension after
external volumes or partitions are mounted.- Automount mounts all partitions to subdirectories in “/mnt”. The nvram usb_automount parameter
defaults to “1” (enabled), at least in recently compiled “.trx” firmware builds). - Logic is needed to tell if the .autorun file ran right after an upgrade or on reboot during normal operation.
- Performing an upgrade via the shell is safer than via the web interface. From the shell, you download a .zip
and check for magic number errors when extracting the archive. Most devices have enough RAM
to host the .zip. Uploading a “.trx” file via the web interface is more risky, especially on a less stable connection,
such as a WiFi client.
- Clearing NVRAM and restoring variables remotely via a script could lead to a serious lockout or bootloop.
Even if such an approach (having a list of nvram set commands) saved time, too many things can go wrong.
- Having a stable basic Internet connection, VPN, and LAN parameters could allow an internal device
(like a PC or small service/maintenance appliance RPI) to announce its availability. This could allow it
to be accessed remotely for finalizing the whole post-upgrade configuration. A VPN may not be needed
if a remote access tool such as Teamviewer were available).
- Upgrade options using TFTP wouldn't be viable because of the need to trigger the transfer during a short
(a few seconds) service window during power-up. Also, such options may require specific button combinations
which would not be practical.
- Other options to do a controlled reconfiguration during upgrade might include leaving specific entry points,
hooks, or callback scripts. However, this would require thorough examination, development and testing.
Such work might be unfeasible if developer resources were limited.
GENERAL DISCLAIMER
WARNING: EXTREME CAUTION IS ADVISED WHEN PERFORMING THESE TASKS.
Your router could be rendered completely unusable.
Remote Upgrade types
There are several types of remote upgrades. They can be summarized in order of risk, as follows:
- Dirty upgrade - overwrites the firmware and retains current NVRAM settings. This is probably
the safest method. It will function similar to an upgrade using the router's web interface.
- Clean upgrade - overwrites firmware and erases NVRAM settings, (restoring the default ones).
This will restore default settings, IP address and logon credentials. This is generally not a good option
when doing a remote upgrade. However, it can speed up the upgrade process if you're beside the router.
- Advanced upgrade - overwrites firmware, saves selected NVRAM configuration, erases NVRAM
and restores saved settings via USB automount. This should be used only in unusual cases.
Such cases include sensitive remote installations, large installations, or anything that would justify
automating that level of complexity.
Dirty Upgrade
Clean Upgrade
Advanced Upgrade
…
Proof of Concept
Based on the above considerations and other resources, remote upgrades were successfully performed to the architecture described in the preconditions above.
The entire procedure was attempted after thorough testing. This testing was done using a dedicated lab setup that mimicked the live remote preconditions.
All the scripts described below should be adjusted before attempting to perform such upgrades. Anyone attempting to perform these procedures should clearly understand all associated risks before attempting them.
There is no guarantee that any of the actions described here will work on your infrastructure, architecture, and hardware/software setup.
Here are the steps to follow, (subject to your own preferences/best practices):
- Evaluate the use of external files for certificates.
- Evaluate the use of an external file for the list of parameters to be preserved.
- Replace the: `….` notation for subshell with FreshTomato's default syntax of: “$(….)”.
- Consider handling EOL of files you reference internally. There are many sed examples
on how to do this and force LR. - Consider defining the USB path as a variable at the beginning of your script.
- Remember: some devices might have multiple USB drives plugged/multiple partitions.
A “scan” of their content might help.
Preservation of Parameters and Restore Process
The following were consolidated for my main router over several years. There are approximately 233 customized parameters in the entire set.
The Main Preserve Script, with a list of parameters to save, creates the Restore script with actual parameter values.
Caution: Unexpected side effects can occur if any parameter value contains the single quote (') character. Consider replacing single quotes with double quotes (“) whenever possible.
After every upgrade, you should review the FreshTomato changelog and code commits to help you decide whether further configuration adjustments will be needed. Such adjustments could be caused by:
- Bug fixes
- Extended options
- New features
- Explicit recommendations from the developers
New/revised parameters are adjusted in the ”/opt/nvram_upgrade_preserve.sh“ script:
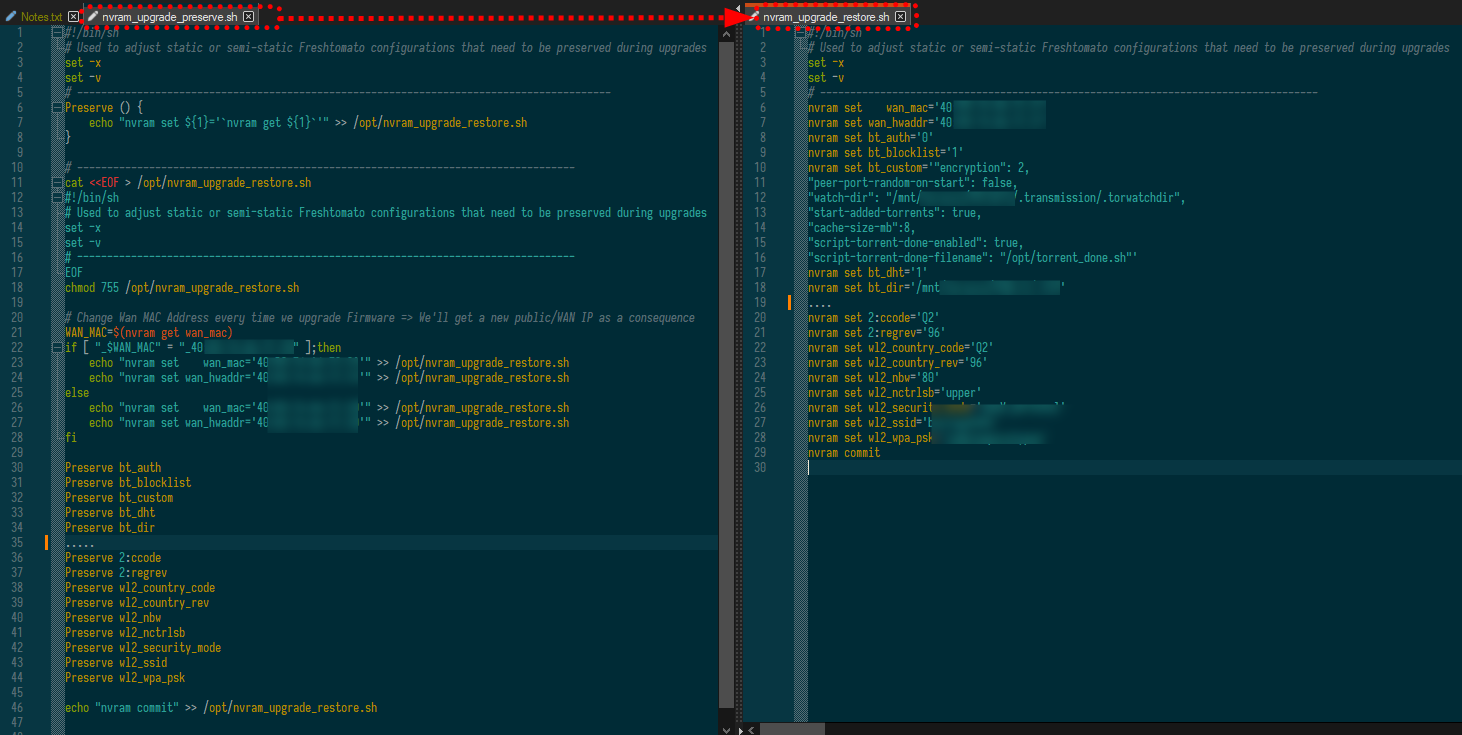
The “nvram_upgrade_preserve.sh” script is as follows:
#!/bin/sh
# Used to adjust static or semi-static Freshtomato configurations that need to be preserved during upgrades
set -x
set -v
# -----------------------------------------------------------------------------------------
Preserve () {
    echo "nvram set ${1}='`nvram get ${1}`'" >> /opt/nvram_upgrade_restore.sh
}

# -----------------------------------------------------------------------------------
cat <<EOF > /opt/nvram_upgrade_restore.sh
#!/bin/sh
# Used to adjust static or semi-static Freshtomato configurations that need to be preserved during upgrades
set -x
set -v
# -----------------------------------------------------------------------------------
EOF
chmod 755 /opt/nvram_upgrade_restore.sh

# Change Wan MAC Address every time we upgrade Firmware => We'll get a new public/WAN IP as a consequence
WAN_MAC=$(nvram get wan_mac)
if [ "_$WAN_MAC" = "_40:00:00:00:00:00" ];then
    echo "nvram set    wan_mac='40:00:00:00:00:01'" >> /opt/nvram_upgrade_restore.sh
    echo "nvram set wan_hwaddr='40:00:00:00:00:01'" >> /opt/nvram_upgrade_restore.sh
else
    echo "nvram set    wan_mac='40:00:00:00:00:00'" >> /opt/nvram_upgrade_restore.sh
    echo "nvram set wan_hwaddr='40:00:00:00:00:00'" >> /opt/nvram_upgrade_restore.sh
fi

Preserve bt_auth
Preserve bt_blocklist
Preserve bt_custom
Preserve bt_dht
Preserve bt_dir
Preserve bt_enable
Preserve bt_lpd
Preserve bt_log
Preserve bt_log_path
Preserve bt_pex
Preserve bt_settings
Preserve bt_settings_custom
Preserve bt_sleep
Preserve bt_ul
Preserve bt_ul_enable
Preserve ctf_disable
Preserve crt_ver
Preserve cstats_enable
Preserve cstats_path
Preserve cstats_stime
Preserve ddnsx0
Preserve ddnsx_refresh
Preserve dhcp1_lease
Preserve dhcp_moveip
Preserve dhcp_num
Preserve dhcp_start
Preserve dhcpc_minpkt
Preserve dhcpd_endip
Preserve dhcpd_gwmode
Preserve dhcpd_lmax
Preserve dhcpd_slt
Preserve dhcpd_startip
Preserve dhcpd_static
Preserve dhcpd_static_only
Preserve dns_intcpt
Preserve dnsmasq_custom
Preserve dnssec_method
Preserve http_enable
Preserve http_passwd
Preserve http_id
Preserve https_crt_file
Preserve https_crt_gen
Preserve https_crt_save
Preserve https_crt_timeset
Preserve https_enable
Preserve https_lanport
Preserve lan1_ifname
Preserve lan1_proto
Preserve lan2_ifname
Preserve lan3_ifname
Preserve lan_hostname
Preserve lan_ipaddr
Preserve log_dropdups
Preserve log_events
Preserve log_file_custom
Preserve log_file_keep
Preserve log_file_path
Preserve log_file_size
Preserve log_limit
Preserve log_mark
Preserve ms_dbdir
Preserve ms_dirs
Preserve ms_sas
Preserve ne_shlimit
Preserve nginx_docroot
Preserve nginx_enable
Preserve nginx_fqdn
Preserve nginx_php
Preserve nginx_port
Preserve nginx_servercustom
Preserve nginx_upload
Preserve ntp_server
Preserve ntpd_enable
Preserve ntpd_server_redir
Preserve router_name
Preserve rrule0
Preserve rrule1
Preserve rrule2
Preserve rruleN
Preserve rrules_activated
Preserve rstats_enable
Preserve rstats_path
Preserve rstats_stime
Preserve sch_c1
Preserve sch_c1_cmd
Preserve sch_c1_last
Preserve sch_c2
Preserve sch_c2_cmd
Preserve sch_c2_last
Preserve sch_c3
Preserve sch_c3_cmd
Preserve sch_c3_last
Preserve sch_c4
Preserve sch_c4_cmd
Preserve sch_c4_last
Preserve sch_c5
Preserve sch_c5_cmd
Preserve sch_c5_last
Preserve sch_rboot
Preserve sch_rcon
Preserve script_fire
Preserve script_wanup
Preserve smbd_autoshare
Preserve smbd_cpage
Preserve smbd_cset
Preserve smbd_custom
Preserve smbd_enable
Preserve smbd_ifnames
Preserve smbd_master
Preserve smbd_nlsmod
Preserve smbd_passwd
Preserve smbd_protocol
Preserve smbd_shares
Preserve smbd_user
Preserve smbd_wgroup
Preserve smbd_wins
Preserve snmp_enable
Preserve sshd_authkeys
Preserve sshd_dsskey
Preserve sshd_ecdsakey
Preserve sshd_ed25519
Preserve sshd_hostkey
Preserve stealth_mode
Preserve stubby_resolvers
Preserve telnetd_eas
Preserve tm_sel
Preserve tm_tz
Preserve tomatoanon_answer
Preserve tomatoanon_enable
Preserve upnp_custom
Preserve upnp_custom
Preserve upnp_enable
Preserve upnp_lan1
Preserve upnp_lan2
Preserve upnp_lan3
Preserve upnp_lan
Preserve usb_fs_exfat
Preserve usb_fs_hfs
Preserve usb_fs_zfs
Preserve vpn_client1_addr
Preserve vpn_client1_ca
Preserve vpn_client1_cn
Preserve vpn_client1_crt
Preserve vpn_client1_custom
Preserve vpn_client1_key
Preserve vpn_client1_ncp_ciphers
Preserve vpn_client1_password
Preserve vpn_client1_port
Preserve vpn_client1_proto
Preserve vpn_client1_tlsremote
Preserve vpn_client1_userauth
Preserve vpn_client1_username
Preserve vpn_client1_useronly
Preserve vpn_client2_addr
Preserve vpn_client2_ca
Preserve vpn_client2_cn
Preserve vpn_client2_crt
Preserve vpn_client2_custom
Preserve vpn_client2_key
Preserve vpn_client2_ncp_ciphers
Preserve vpn_client2_password
Preserve vpn_client2_port
Preserve vpn_client2_proto
Preserve vpn_client2_tlsremote
Preserve vpn_client2_userauth
Preserve vpn_client2_username
Preserve vpn_client2_useronly
Preserve vpn_client_eas
Preserve vpn_server1_ca
Preserve vpn_server1_crt
Preserve vpn_server1_custom
Preserve vpn_server1_dh
Preserve vpn_server1_key
Preserve vpn_server1_ncp_ciphers
Preserve vpn_server1_port
Preserve vpn_server1_proto
Preserve vpn_server1_sn
Preserve vpn_server1_users_val
Preserve vpn_server2_users_val
Preserve vpn_server_eas
Preserve wan1_gateway_get
Preserve wan1_get_dns
Preserve wan2_gateway_get
Preserve wan2_get_dns
Preserve wan3_gateway_get
Preserve wan3_get_dns
Preserve wan4_gateway_get
Preserve wan4_get_dns
Preserve wan_dns
Preserve wan_dns_auto
Preserve wan_hostname
Preserve wan_wins
Preserve web_adv_scripts
Preserve web_css
Preserve web_mx
Preserve wl_country_code
Preserve wl_country_rev
Preserve wl0_akm
Preserve wl0_channel
Preserve wl0_chanspec
Preserve 0:ccode
Preserve 0:regrev
Preserve wl0_country_code
Preserve wl0_country_rev
Preserve wl0_nbw
Preserve wl0_nctrlsb
Preserve wl0_security_mode
Preserve wl0_ssid
Preserve wl0_wpa_psk
Preserve wl1_akm
Preserve wl1_channel
Preserve wl1_chanspec
Preserve 1:ccode
Preserve 1:regrev
Preserve wl1_country_code
Preserve wl1_country_rev
Preserve wl1_nbw
Preserve wl1_nctrlsb
Preserve wl1_security_mode
Preserve wl1_ssid
Preserve wl1_wpa_psk
Preserve wl2_akm
Preserve wl2_channel
Preserve wl2_chanspec
Preserve 2:ccode
Preserve 2:regrev
Preserve wl2_country_code
Preserve wl2_country_rev
Preserve wl2_nbw
Preserve wl2_nctrlsb
Preserve wl2_security_mode
Preserve wl2_ssid
Preserve wl2_wpa_psk

echo "nvram commit" >> /opt/nvram_upgrade_restore.sh
Firmware Upgrade Custom Script
Script: “firmup.sh”
#!/bin/sh
{
#set -x
#set -v
#=========================================================================
# Ref: https://wiki.freshtomato.org/doku.php/remote_upgrade_poc
#
# Dirty Upgrade: overwrite the firmware + keep the current nvram settings
#     firmup.sh -n firmware_image.trx
# Clean Upgrade: overwrite the firmware + erase the nvram settings essentially restoring the default ones (Recommended)
#     firmup.sh -e firmware_image.trx
#=========================================================================

# Variables Definition
ERASE_NVRAM="$1"
FIRMWARE="$2"

# Functions Definition
# e_logr - echo message and logs to syslog with proper priority/tag
e_logr () {
        echo "${1}"
        logger -p NOTICE -t FT-Upgrade "${1}"
}

# Main

# Check proper command syntax and parms #
if [ $# -ne 2 ] || [ "_${ERASE_NVRAM}" != "_-n" -a "_${ERASE_NVRAM}" != "_-e" ]; then
    e_logr "Usage: $(basename ${0}) -e|-n firmware_file.trx"
    exit 1
fi

# Prepare/Check firmware flashing pre-requisites
if [ ! -s "${FIRMWARE}" ]; then
    e_logr "${FIRMWARE} does NOT exist or is empty (0 length). Exiting..."
    exit 2
fi

# Copy firmware file to /tmp directory
# Avoids issues of missing /mnt/<volume> after we issue 'kill -s SIGUSR1 1' below
e_logr "Copying ${FIRMWARE} to /tmp directory..."
TMPFIRMWARE="/tmp/$(basename ${FIRMWARE})"
cp "${FIRMWARE}" "${TMPFIRMWARE}"

if [ "_${ERASE_NVRAM}" == "_-e" ];then WWO="w/"; else WWO="w/o";fi
e_logr "Performs a canonical upgrade ${WWO} nvram clearing"
# Check if firmware  file is present and not 0
if [ ! -s "${TMPFIRMWARE}" ]; then
    e_logr "${TMPFIRMWARE} does NOT exist or is empty (0 length)"
    e_logr "Check source Firmware file presence and consistency:"
    e_logr "      ${FIRMWARE}"
    exit 2
fi

e_logr "About to start Flashing firmware:"
e_logr "    MD5=$(md5sum ${TMPFIRMWARE})"
e_logr "Press ENTER to continue (or Ctrl-C to exit)"
read x

# Prepare/Check firmware flashing pre-requisites
e_logr "Waiting for services to stop."
nvram set action_service=upgrade-start
sleep 1
kill -s SIGUSR1 1
c=1;while [ "$(nvram get action_service)" ];do echo -n $c\ ;c=$((c+1));sleep 1;done;echo
e_logr "Services stopped."

# Flash/Write firmware file
e_logr "Writing firmware ${TMPFIRMWARE}"
nohup mtd-write2 ${TMPFIRMWARE} linux > /tmp/nohup.out 2>/dev/null &
c=1;while [ "$(pidof mtd-write2)" ];do echo -n $c\ ;c=$((c+1));sleep 1;done;echo
sleep 1

# Check if "/tmp/nohup.out" output file is present and not 0
if [ ! -s "/tmp/nohup.out" ]; then
    e_logr "/tmp/nohup.out does NOT exist or is empty (0 length)"
    e_logr "mtd-write2 ${TMPFIRMWARE} NOT successfully completed!"
    e_logr "Try again now or perform a manual 'reboot' and repeat the upgrade procedure..."
    exit 3
fi
cat /tmp/nohup.out | sort -u; rm /tmp/nohup.out
e_logr "Flash finished."

# Is nvram erase requested?
if [ "_${ERASE_NVRAM}" == "_-e" ]; then
        e_logr "Clearing nvram"
        mtd-erase2 nvram
        sleep 1
fi

# All set... time to reboot
e_logr "Rebooting..."
sleep 1
reboot &
c=1;while true;do echo -n $c\ ;c=$((c+1));sleep 1;done
exit
}
Post-upgrade, Automatic, Persistent Epilogue Script
Script: 00-00-identify.autorun
#!/bin/sh
set -x
set -v
# This is 00-00-identify.autorun
# To be stored in the root dir of an external USB drive to guarantee persistence
# FT Automount functionality automatically mounts all partitions to sub-directories in /mnt.
# nvram usb_automount defaults to 1 (enabled - at least in recently compiled .trx FWs)
# 00-00-identify.autorun file is executed if existing from each mounted partition
logger "AUTORUN id: [$0] [$1] $(date '+%D %T') uptime: $(cut -f1 -d\  /proc/uptime)"
OS_VERSION_UNDERSCORED=$(nvram get os_version | tr " " "_")
MODEL=$(nvram get t_model_name | tr " " "_")
ROUTER_NAME=$(nvram get router_name | tr " " "_")
SPEC="${ROUTER_NAME}_${MODEL}_${OS_VERSION_UNDERSCORED}"
BOOTLOG="${1}/boot.log"

c=0;while true;do NVRAMBCK="${1}/${SPEC}_nvram_${c}.cfg";if [ ! -s "${NVRAMBCK}" ];then break; else c=`expr $c + 1`;fi;done
nvram save "${NVRAMBCK}";nvram show > "${NVRAMBCK}.txt"

echo "---------------------------------------------------------------" >> "${BOOTLOG}"
echo "--- ${SPEC}" >> "${BOOTLOG}"
echo "---------------------------------------------------------------" >> "${BOOTLOG}"
echo "AUTORUN id: [$0] [$1] $(date '+%D %T') uptime: $(cut -f1 -d\  /proc/uptime)" >> "${BOOTLOG}"

if [ "_`nvram get upgrade_epilogue_config`" != "_done" ] ; then
        echo "upgrade_epilogue_config != done ; setting nvram parameters and rebooting..." >> "${BOOTLOG}"

        nvram set wan_proto=pppoe
        nvram set wan_ppp_username=username
        nvram set wan_ppp_passwd=password
        nvram set wan_sta=
        nvram set ddnsx0='afraid<<<<<<bmt....<token>....MTc='
        nvram set ddnsx_refresh='1'

        nvram set vpn_server1_ca='-----BEGIN CERTIFICATE-----
MIIDGTCCAgGgAwIBAgIBATANBgkqhkiG9w0BAQsFADAVMRMwEQYDVQQDDApvcGVu
....
ZGDWu/rGtWIFcTsoxr797jaIKspY1NtCrIgsd0E=
-----END CERTIFICATE-----'
        nvram set vpn_server1_crt='-----BEGIN CERTIFICATE-----
MIIDADCCAeigAwIBAgIIaY3sRfUVtHwwDQYJKoZIhvcNAQELBQAwFTETMBEGA1UE
....
8U8TAg==
-----END CERTIFICATE-----'
        nvram set vpn_server1_custom='verb 5
script-security 2
#crl-verify /home/root/crl.pem
tls-version-min 1.2
auth SHA512'
        nvram set vpn_server1_dh='-----BEGIN DH PARAMETERS-----
MIIBCAKCAQEA3IH5AwWcIMSaHXFkSh5BUrRiiruQYgToSnGVCW328rYn8kOyLRxS
....
Nb2Va+s+Hju96X4HlDEhiJHDzoS13ozwUwIBAg==
-----END DH PARAMETERS-----'
        nvram set vpn_server1_key='-----BEGIN PRIVATE KEY-----
MIIEvQIBADANBgkqhkiG9w0BAQEFAASCBKcwggSjAgEAAoIBAQC2kmZJzzFJrHel
....
3T3FRuaIoGEfYGhIATCDeo0=
-----END PRIVATE KEY-----'
        nvram set vpn_server1_ncp_ciphers='CHACHA20-POLY1305:AES-256-GCM:AES-256-CBC'
        nvram set vpn_server1_port='443'
        nvram set vpn_server1_proto='tcp-server'
        nvram set vpn_server1_sn='10.10.20.0'
        nvram set vpn_server1_users_val=''
        nvram set vpn_server2_users_val=''
        nvram set vpn_server_eas='1,'

        # This script takes care of reconfiguring other necessary parameters in nvram
        ${1}/optware/nvram_upgrade_restore.sh

        nvram set upgrade_epilogue_config=done
        nvram commit
        reboot
        c=1;while true;do echo -n $c\ ;c=`expr $c + 1`;sleep 1;done
fi

echo "upgrade_epilogue_config == done ; ready to Rock'n'Roll..." >> "${BOOTLOG}"

# Mount optware
logger "AUTORUN id: [$0] [$1] Checking mounted /proc/mounts for presence of /opt Optware"
if /bin/grep -q /opt /proc/mounts
then
  logger "AUTORUN id: [$0] [$1] umount /opt Optware if already mounted"
  /bin/umount /opt
  if [ $? -ne 0 ]
  then
    logger "AUTORUN id: [$0] [$1] umount failed, script not continuing"
    exit 1
  fi
fi

logger "AUTORUN id: [$0] [$1] Mounting bindable /tmp/mnt/myusbdrive/optware to /opt"
/bin/mount -o bindable /tmp/mnt/myusbdrive/optware /opt

# This is just an example of what can be done with mount --bind
# it allows to replace files in normally read-only /root filesystem with custom ones
# mount --bind /mnt/usb/advanced-vlan.asp /www/advanced-vlan.asp

logger "AUTORUN id: [$0] [$1] If we are here... then we have a mounted /opt"
logger "AUTORUN id: [$0] [$1] Let's GO!!!"
Alternatives
- Compile your own firmware with your settings hard-coded within it.
- Building the compilation environment requires a lot of effort.
- Consolidated experience with such process is necessary.
- Earlier attempts were made using steps from: freshtomato-arm
README.md.
However, these methods weren't able to generate a byte match
between their .trx build and .trx images prepared for general distribution
in the download repository
Remote Upgrade Notes and Troubleshooting
References
Whats the best way to upgrade Tomato upgrade 2020.2 AIO to latest
Feature request: Separate firmware-upload and reboot actions
Run one off script after installation/upgrade
A curiosity...why can't Tomato have router config backup across versions?
Safe to run MTD ERASE NVRAM on WRT610n?
The ”nvram set“ command can be effectively integrated with the backup_nvram script
Credits
remote_upgrade_poc.txt · Last modified: by hogwild